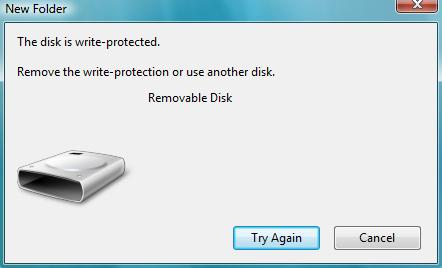
Have you ever encountered a situation, when you just inserted your USB Flash drive into your computer and tried to format it but alas, what you see is the error “Your disk is write-protected”?
Your landing on this page ensures that you have gone through such situations and you want a quick solution on how to format a write protected USB flash drive.
Write-protection on disks is the feature that is designed to protect our data on USB flash drives from being modified without authentication.
Many times situation comes when our system gets infected by various types of malicious functions and files, stored on our computer system get modified without our permission. It happens because those files on our computer systems are not write-protected.
If these files were read-only, no virus, malware or any bad program on earth could ruin these files. Well, my point was just to let you know that such protections are meant to prevent users from unexpected data loss.
But we don’t all the time want such write-protection on our USB flash drive or pen drive. Sooner or later, we feel the need to format the flash drive or feel like modifying the existing files stored on our pen drive.
But How to erase a write-protected USB drive or SD card?? Well, that’s what we will be teaching you today! We will tell you, how to format write protected pen drive in easy steps.
How to Format a Write Protected USB Flash Drive:
Formatting a write-protected USB flash drive might not be a one-step process but it’s not a tough process either. In fact, there is more than one method available to Enable or Disable Disk Write Protection on USB flash drive or pen drive.
The first method which we have mentioned below involves the Command Prompt. The second method is using the System Registry and the last method to disable write protection from a pen drive is by using third-party software.
In this guide, we have covered first and the second method as both these methods are sufficient and works in most of the circumstances.
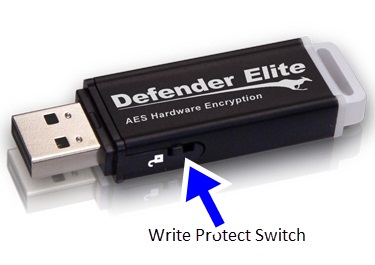
But before we head over to the steps, I would like to confirm if your USB flash drive has a physical button to enable or disable disk protection.
Most of the new pen drives and flash drives are coming with this button and we can simply enable or disable write protection on them by simply switching on or off this little button.
Have a look at the below image to understand how this button looks like. If your USB flash drive has any such button, you no need to go any further and follow any method. Just locate this button on your drive and enable or disable it as per your need.
Okay, so let’s get started with the guide.
Method 1. Using Command Prompt:
In this method, we will be using a Windows command prompt utility called Disk part. Here’s are the steps.
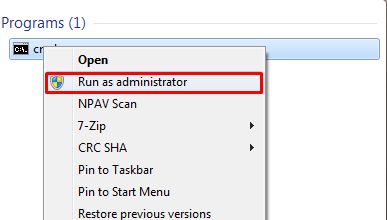
Step 1. First of all, click on the Start menu, and type cmd in the search bar, right-click on the first result and select Run as administrator from the list of options.
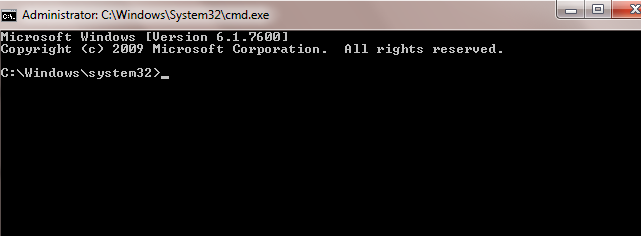
Step 2. As sooner you do this, Command prompt window in the administrator mode will pop up. See the screenshot below.
Step 3. Now you need to type in diskpart in the command line and press enter. Once done, type in list disk command in the command prompt and press enter.
These commands will instruct your computer to list out all the internal and external hard disks associated with your computer. The list will be in a sort of a tabular form.
You can understand this whole step by having a look at the below screenshot.
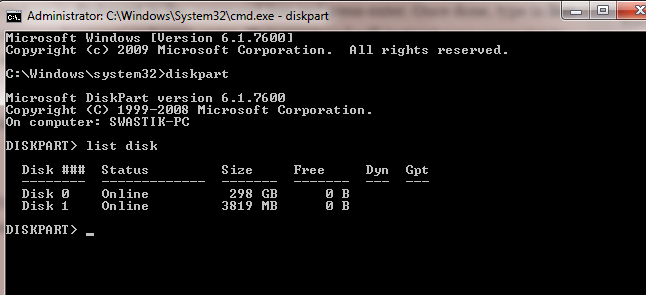
Step 4. Now you need to identify your USB flash drive out of all the listed drives. Usually, the one with the low storage capacity mostly in MBs is your USB flash drive. As in our case, it is Disk 1, with 3819 MB capacity.
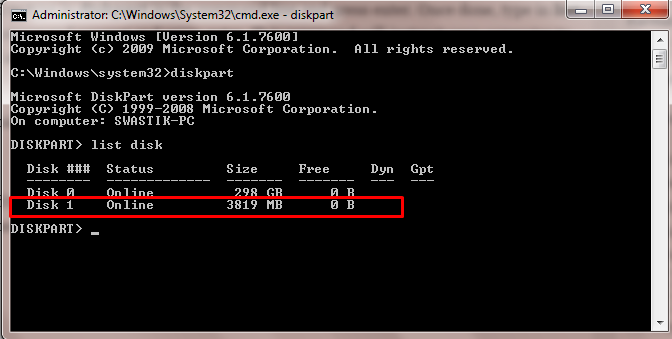
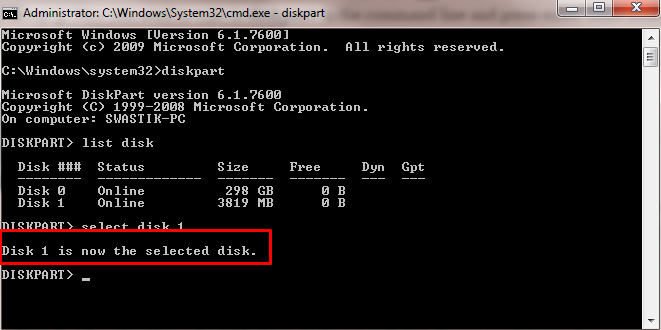
Step 5. After identifying the USB drive, it’s time to select it. So you need to run the command “select Disk 1″. You can replace “Disk 1” with flash drive name on your computer.
On doing that, a pop-up window will appear notifying you about disk 1 selection., exactly like the below screenshot.
Step 6. We are almost done to make the USB drive protection-free. Once you are done following the above steps, it’s time to run one more command. Now type in “attributes disk clear read-only” and press enter.
On doing that, you will see a success message that disk attributes are cleared successfully and your drive will become protection free.
Step 7. Now you can format the drive via command prompt running the commands clean, create partition primary, and format fs=ntfs respectively. Or by simply right-clicking the drive in my computer and selecting Format. It’s completely your choice.

Method 2. By Using Registry:
If you are not very comfortable with command prompt and want an alternate method, follow the below-given steps.
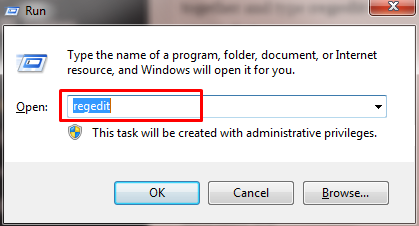
Step 1. As I said above, this method involves Registry Editor. So, to reach there, press Windows+R keys together and type regedit in the run window’s search bar and press enter. Have a look at the below screenshot.
Step 2. In the registry editor, you need to follow the below path.
Computer\HKEY_LOCAL_MACHINE\SYSTEM\CurrentControlSet\Control\StorageDevicePolicies
As you reach there, you will see the Writeprotected written in the left pane. See the below screenshot to understand better.
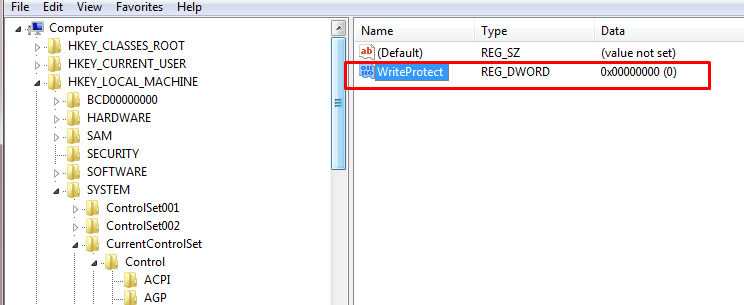
Step 3. Now double-click on the Writeprotected and another window named Edit DWORD will pop-up.
Undervalue data, you need to change the value from 1 to 0 to disable write protection from the drive. You can understand better if you see the below screenshot.
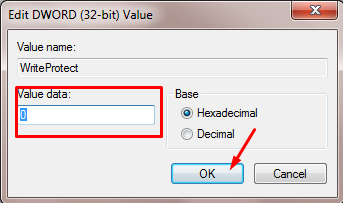
Once done, just press ok and you are done. Now you can edit the files stored on your pen drive or can format it depending upon your needs.
I guess, you know the process to format the drive, isn’t it?
So, that’s it for this guide. I’m sure you got all the steps clearly on how to format a write protected USB flash drive. If you have encountered any issues in following the steps, feel free to write to us in the comment section below, we will reach out to you as soon as possible.