Have you ever heard someone saying google DNS servers provide faster internet than your local Internet service provider?? If no, then you are missing out something.
The Google DNS servers status has the ability to offer you the fast as well as the secure internet service. Most of the time we fear to use the public DNS server due to the lack of security they offer but the Google Public DNS is different from this.
Google is the world’s biggest organization, if they offer something, we can trust it blindly. Moreover, they have a mechanism to provide the most secure DNS service despite its public.
If you have never come to know the fact that Google DNS servers offer faster internet speed, you can try that by yourself. The steps are extremely simple!
So want to know how to switch to OpenDNS or Google DNS to speed up web browsing? I’m sure you are dying to know, who don’t want the fast internet after all!
So, let’s get started with the guide!
How to Use Google DNS Servers:
Different browsers have a different set of rules to change the DNS servers but the overall idea is the same. Since we can’t cover the method to change the DNS servers in all the windows, we have explained the two major windows versions, windows XP and windows 7.
Following similar steps, you can replace the DNS servers of your local browser to Google’s public DNS. Let’s see what are the steps.
#WIndows 7 and Above
Windows 7 and above users need to follow the below steps for replacing their local DNS servers to Google’s public DNS server.
Step 1. To change the DNS server settings, you need to go to the network place on your computer. To do that, click on the small network icon in the bottom right area of your computer and click on Open the Network and Sharing Center. See the screenshot below to locate the option easily.
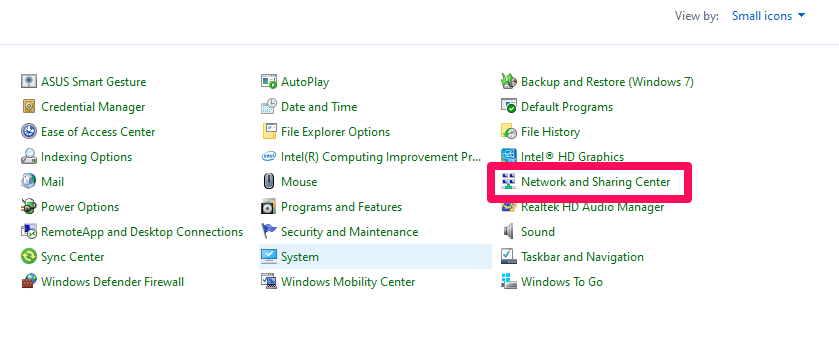
Alternatively, you can go to Control panel> Network and Sharing Center. Following both the ways, you will see the above window.
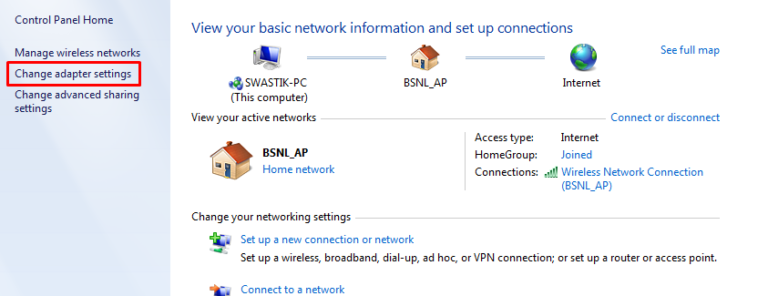
Step 2. On the Network and Sharing page, click on the Change Adapter Settings in the left pane. This is the page where information on all your connection is given.
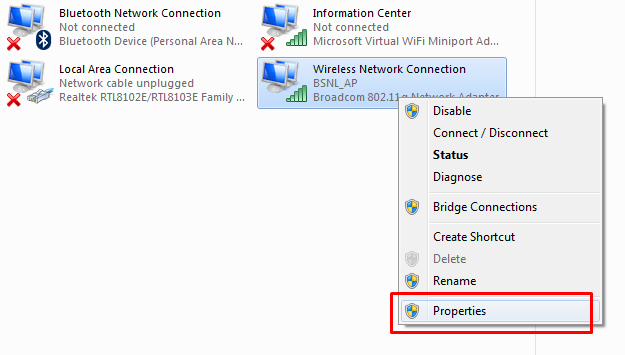
Ignore the rest of the network connections except the one which is active. Right-click on it and Go to Properties. Have a look at the below screenshot to understand the process.
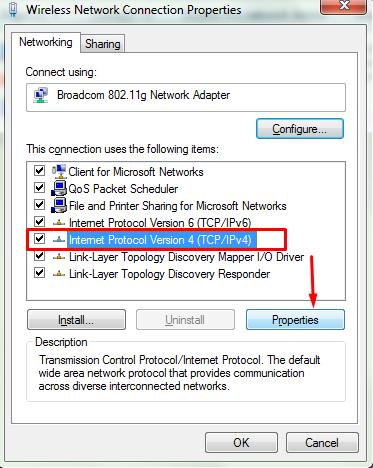
Step 3. On clicking the Properties option, the Wireless Network Connection Properties window will pop up. Now under the section, This connection uses the following items, select the option Internet Protocol Version 4 (TCP/IPv4).
Once done, click on Properties. Have a look at the below screenshot to find the options easily.
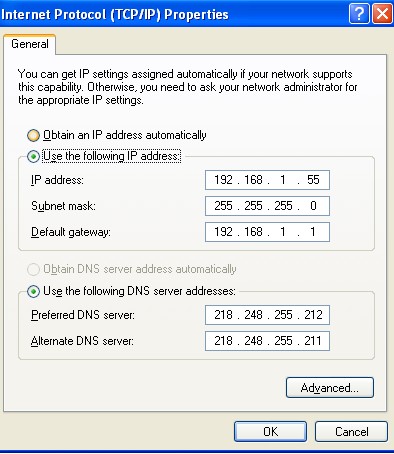
The Internet Protocol Version 4 (TCP/IPv4) Properties window looks like the below image.
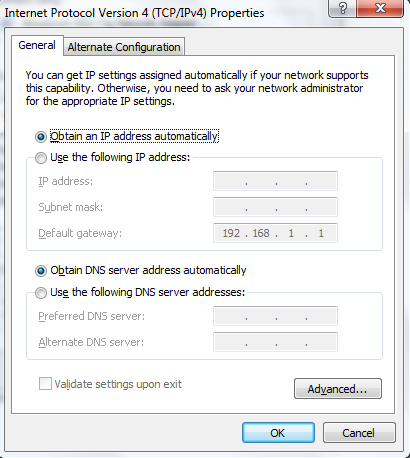
Step 4. In order to change the DNS server address, you need to select the Use the following DNS server addresses. As sooner you do this, the two Preferred DNS server and the Alternative DNS server will get open to type.
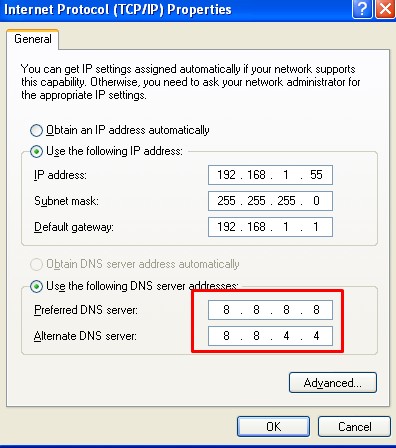
Now we need to type in the Google Server address here. Google’s Public DNS IP addresses (IPv4) are,
Preferred: 8.8.8.8
Alternate: 8.8.4.4
Have a look at the below image to see how we need to do this.
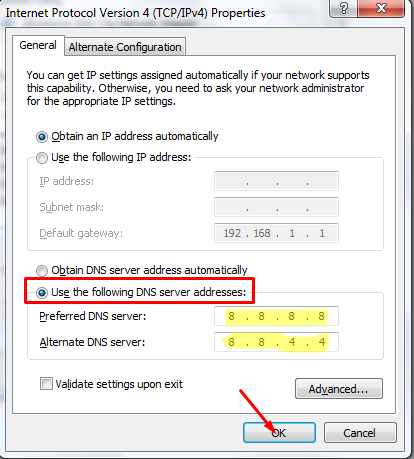
Once all the changes are done, click Ok to save the changes. Now restart your computer and see the changes taking place. If you want to replace your local DNS servers to the public network, the method is identical, except the address of the DNS servers.
The DNS address for a public network is given below.
Preferred: 208.67.222.222
Alternate: 208.67.220.220
Now head over to the second portion of the guide to see how to change DNS server into Windows XP.
#WIndows XP
For Windows XP users, the process is even simple. Just a few simple clicks and you are done. Here are the steps.
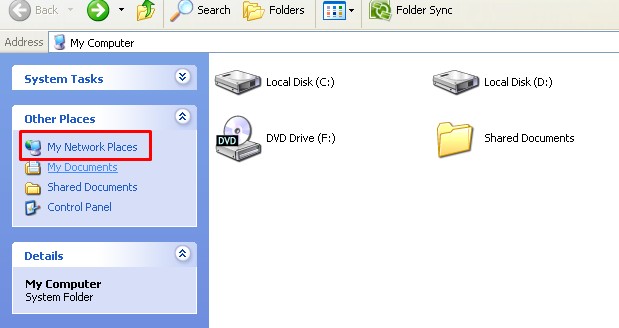
Step 1. To change the DNS address of your network in Windows XP, click on the start menu and go to my computer. Or, you can also directly go to my computer from the desktop.
Step 2. In My Computer window, go to My Network Places from the left panel. See the screenshot below.
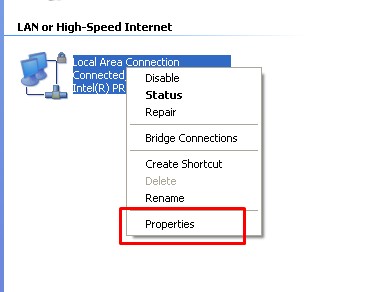
Step 3. Now go to View Network connections from the left pane and you will see a list of all the network connected to your computer. Now right click on the active connection on your computer and go to Properties. The screenshot is given below.
Step 4. In the local area properties window, click on the option Internet Protocol and then go to Properties. Have a look at the below screenshot.
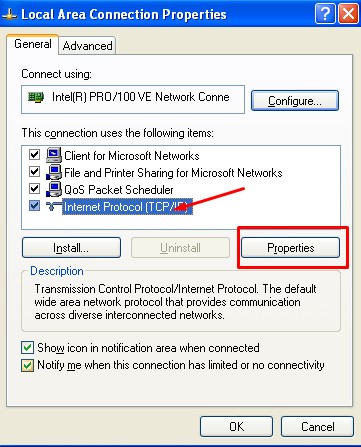
Step 5. Okay, now we have reached the Internet Protocol Properties window and this is the same place we will be changing the DNS address from our local server to the Google’s DNS server.
See the screen below.
Step 6. Now under the option use the Following DNS server, write down the below address.
Preferred: 8.8.8.8
Alternate: 8.8.4.4
The screenshot to show the procedure well is given below.
Step 7. Once the settings are done, click ok to save the changes.
Once done, restart your computer and enjoy the faster speed of the internet.
So that’s how we replace DNS servers from our local ISP to google DNS servers. I hope you have successfully executed all the steps.
After replacing the DNS servers, you will see the changes taking place within minutes. Those websites which were not loading before will be loading now. The speed of your Internet will be considerably changed. These are some of the changes which most of the Google DNS server’s users claim including me.
We have now reached the end of the guide. It’s now time to wrap up the article! But before going off, do let us know how did it affect your server, have the speed of your internet got faster than before?? Do let us know in the comment section below.
Also for any doubt or query, drop us a comment below. We will reach you as soon as possible.