If you own a website or a blog, you must be familiar with the term WordPress. If you don’t know much about WordPress, here is a basic introduction. WordPress is one of the best platforms for creating and running websites.
It is a perfect platform for anyone, be it an expert or a novice. It is the only platform I would ever recommend to you if you dream to create a website!
In the guide provided, I will let you know How to Install WP on cPanel. In this guide, I would cover two methods for installing WordPress. One, is the quick installation, and the other one is installing install WordPress with cPanel.
How to Install WordPress With cPanel?
After reading the complete guide, I am sure you would be able to install WordPress manually on your website using cPanel.
As I said above, I will let you know two methods for installing WordPress. We will begin with the cPanel.
Follow the below steps and learn to install WordPress with cPanel.
Assuming, you already have some basic knowledge regarding hosting and WordPress. If you don’t know, let me tell you, to install WordPress; you should have a hosting account. And there are various hosting providers you can use! Like Bluehost, Hostgator, site ground, etc.
Also, you will need to create a MySQL database and user if you already don’t have that. Once you have that, follow the below steps.
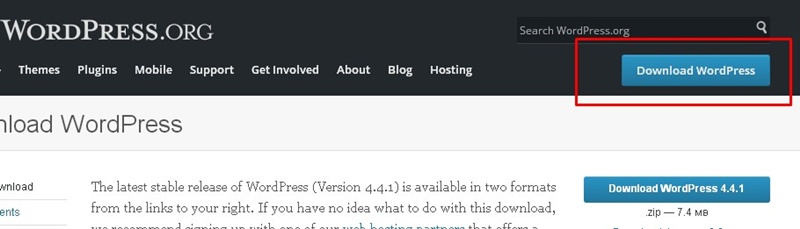
Step 1: Download WordPress
The first step is to download the latest version of WordPress on your computer. You can download it from its official website. If you don’t know the URL of the website, click here.
Once you are done with the downloading, install it on your system. Once done, navigate through it and unzip the zip file.
Step 2. Upload WordPress to the Server
After downloading the WordPress to the computer, you will have to upload it on the server. For this, you can follow any of the following methods.
The first one is by FTP upload. The second way is by going through the file manager and the third way is uploading it by SSH.
We will follow here the second method i.e. via File Manager. For this, the steps are given below.
- First of all, log in to your hosting account.
- Then go to the cPanel.
- Scroll all the way down to the File section. Here, you will see an option, File Manager. Click on it.
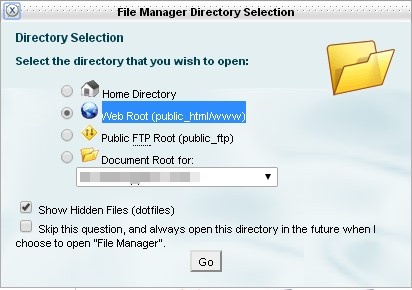
- As sooner you click on the file manager, you’ll be prompted with the File Manager directory selection.
- Simply select WebRoot(public_html/www). Also, make sure to check the option, Show Hidden Files. Once done, click on Go. Check out the image below, if you didn’t get me.
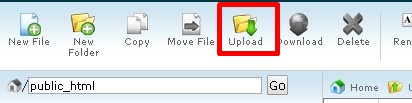
Once done with the above step, click on Upload. Now simply without thinking much, navigate through the WordPress.zip file you just downloaded.
Step 3. Create MySQL Database and User
After following the above steps, it’s time to create a MySQL database. To do so, check out the below steps.
- First of all, go back to the cPanel again.
- Here you will see many options. All you have to do is click on MySQL Database Wizard under the Database section. Check the image below I have mentioned.
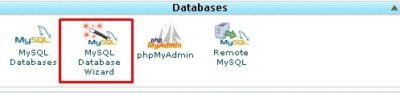
- As soon as you click on the MySQL Database Wizard, you will be asked to enter the name of the database. Type any name here you want. Once done, click Next.
I would suggest you use any easy name that you can remember easily for future use.
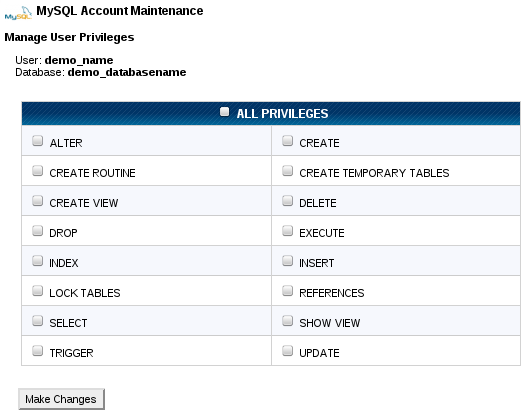
- Now, you will need to create the user of your newly created database. Enter the database user name and password and click Create User.
- In the next step, you will be asked to assign privileges to the user. Click on ALL PRIVILEGES. Once done, follow the next step. Check out the image below.
Step 4. Configure wp-config.php and Run the installation
In this step, you will have to Login to cPanel. The steps are given below. Follow all the steps carefully!
- First of all, login to cPanel. And then go to the Files option. Once done, select File Manager.
- Once done, with the previous step, go to the directory WebRoot(public_html/www).
- Here, you will see an option Show Hidden Files, check on it and then click on Go.
- In the public_html directory, you’ll see some options including a file named wp-config-sample.php. Simply right-click on it, and select the option Rename and change the file name to wp-config.php. Once done, follow the next step.
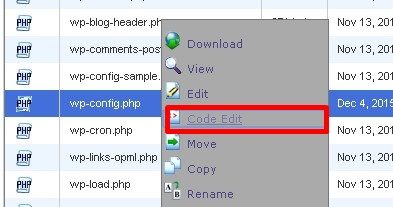
- Following the previous step, again right-click on the file wp-config.php.
- After you right-click on it, you will see various options, click on Code Edit. Check the image below.
As sooner you click on the Code Edit option, you will see the following codes:
define('DB_NAME', 'database_name_here');
/** MySQL database username */ define('DB_USER', 'username_here');
/** MySQL database password */ define('DB_PASSWORD', 'password_here');
Now, without thinking much, write the username and password(We created in step 3) in place of username_here, password_here. Also, enter the database name in place of database_name_here.
That’s it!! You are almost done. Now click on the Save Changes button.
After this, in the new tab or browser, type the URL- http://yourdomainname.com/wp-admin/install.php (here, you will have to replace your domain name with the domain name of your website).
As sooner you do this, you’ll see a welcome page saying “Welcome to the famous five minute WordPress installation process!”.
That’s it!! With the last step, you have reached another method which is a quick installation. The steps are given below.
- Simply, select the language of your website i.e. English, or choose any other language you want.
- And then fill in all the necessary information in the boxes provided. The information that is required contains all the basic info like your Site name, email address, username, password, etc.
- And at last click on the Install Now button. Boom! Your blog is up and running now.
Conclusion
The method of quick installation is another method I was talking about. If you don’t want to install WordPress with Cpanel, then you use the quick installation method.
However, the quick installation process is just a few minutes method, but in case, if the method doesn’t work for any reason, I have provided the method for manual installation as well.
So how do you find our guide on how to Install WordPress with Cpanel? Do let us know via the comments.
Also read: